

The new Haksons High Gloss Resin is ideal for creating multiple pieces of art, including coasters, clocks and trays. It can be used for a single coat, a topcoat in a variety of pours, and be used to create a casting that is up to 6 mm thick. Kumar, from Kumar Resin Works, takes us through the process of creating ocean waves with simple supplies.

Materials Required
Haksons Ocean Resin Art Kit
OR
- Wooden Base
- Masking Tape
- Nitrile Powder Free Gloves
- Tissue Paper
- Wooden Icecream Sticks
- Paper Cups
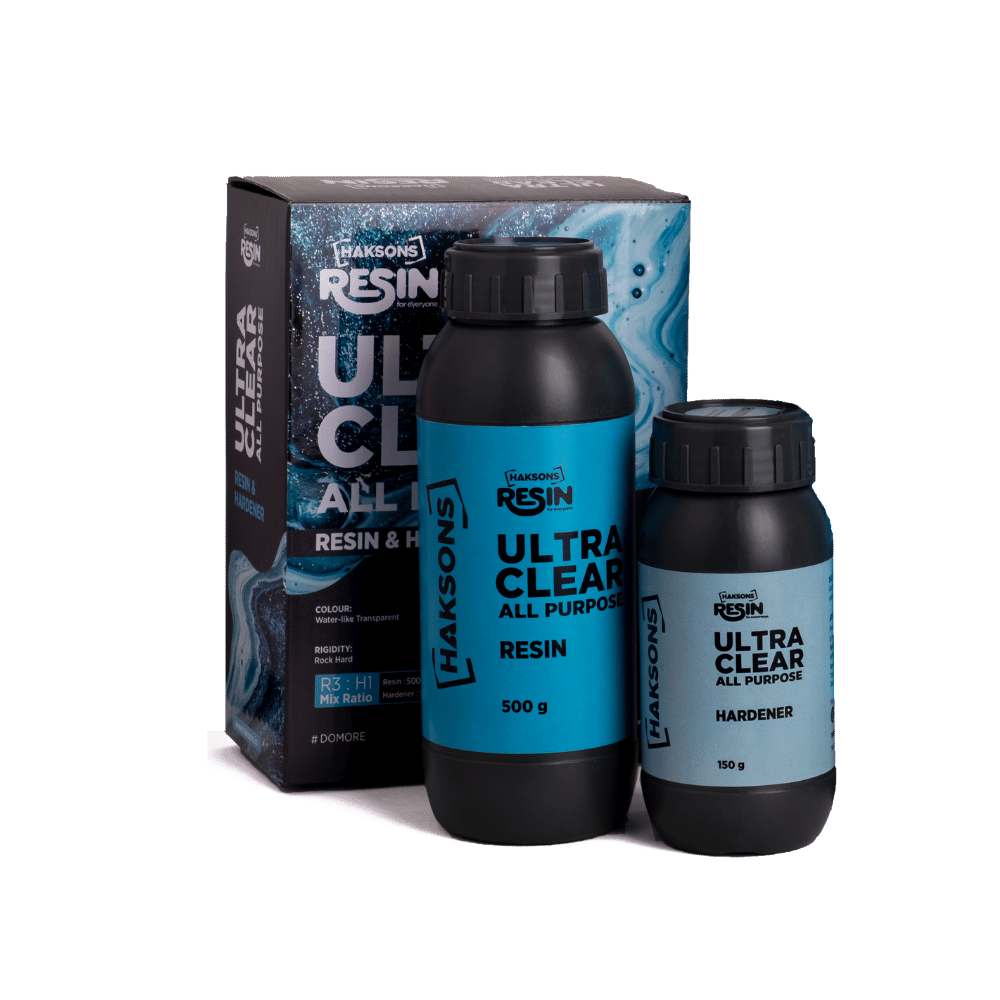
- Haksons High Gloss Resin and Hardener
- Haksons Turquoise Blue Pigment
- Haksons Opaque White Pigment
- Butane Torch
- Hairdryer
1. Prepping the Resin:

Measure out the appropriate quantities of resin and hardener in your paper cup. Kumar uses 90g of resin and 45g of hardener. The proportion is a critical part of the preparation. Make sure you add by weight and don’t eyeball this process. A few millilitres will not make a difference, but a significant gap may cause difficulties during the curing process. Once the two are combined, give them a good stir. Make sure to scrape the edges and bottom of the cup, so you can create a homogenous mix. Make sure to stir for a minimum of 3 to 4 minutes. When the fluid becomes crystal clear, your resin is ready. There should be no translucent thread-like structures in the mixture.
To calculate the amount of resin and hardener, download BohriAlis Resin Calculator App available on iOS and Android.
2. Prepping the Base:

In the video, Kumar uses a pinewood base. Make sure to mask the edges, so that if the resin pours over, the other side is protected and clean. Since we are using wood, you need to pour a single, thin coat of resin to prepare it for the pigmented resin that is to come. This ensures that the wood doesn’t absorb any resin from the main pour.
3. Adding Colour:

There are only two colours required to create this ocean resin art: opaque White and Turquoise Blue. Separate your resin mixture into two paper cups. Mix the Haksons Pigments into the resin mixture, and stir for a minimum of 30 to 40 seconds. Again, mixing to create a homogenous fluid is a critical step.
4. Adding Colour

Cover three-fourths of the base with the blue mixture creating a wave-like outline. Be careful to not overpour. Outline the wave pattern with a thin pour of the white. Fold your paper cup into a beak to do this easily. Once poured, use the blowtorch on the outline to mix them seamlessly.
5. Creating the Waves:

Use a hairdryer, at its highest and hottest setting to push the white into the blue. This will create a wave-like effect in the blue resin.
6. Finishing Touches:
Any air bubbles can be removed with the help of a butane torch. Once done, make sure to let it sit for at least five minutes. The resin cells will organically break up. Should you find that certain parts are stubborn, use the butane torch like a brush for 2-3 seconds to break them up.

Creating ocean resin art with Haksons High Gloss Resin is a rewarding and creative process. As you embark on this artistic journey, remember that the beauty of resin art lies in its uniqueness – no two pieces will ever be identical. Embrace the fluidity of the materials and let your creativity guide you. Once your masterpiece is complete, it becomes not just a beautiful art piece, but a reflection of your artistic vision and skill. Share your work with others, inspire fellow creators, and keep exploring the endless possibilities that Haksons resin offers. Whether you're making a coaster, a clock, or a tray, each creation is a step in your artistic journey. Enjoy the process, and let your ocean resin art shine!
Voila! Your ocean resin art is ready. We would love to see your creations! Find more tutorials from Bohri Ali team here.
Check out the detailed video to create ocean resin art here!
<iframe width="560" height="315" src="https://www.youtube.com/embed/M65elXqYMBA?si=uLYKI5nbU89LbP6w" title="YouTube video player" frameborder="0" allow="accelerometer; autoplay; clipboard-write; encrypted-media; gyroscope; picture-in-picture; web-share" allowfullscreen></iframe>
If you make this, be sure to tag us on Instagram. We would love to see your creations!

Leave a comment
This site is protected by hCaptcha and the hCaptcha Privacy Policy and Terms of Service apply.